Fabulous flourishes
A Vintage Journeys fabulous new Challenge is to use a Flourish
Inspired by
the Tim’s ornate flourish which adorns the packaging and is available in stamps
A great Challenge to use a flourish, any flourish on any
project


Then covered with clear embossing powder, heated then blended with Antique Linen, Rusty Hinge and Walnut Stain Distress Inks covering the unstamped areas

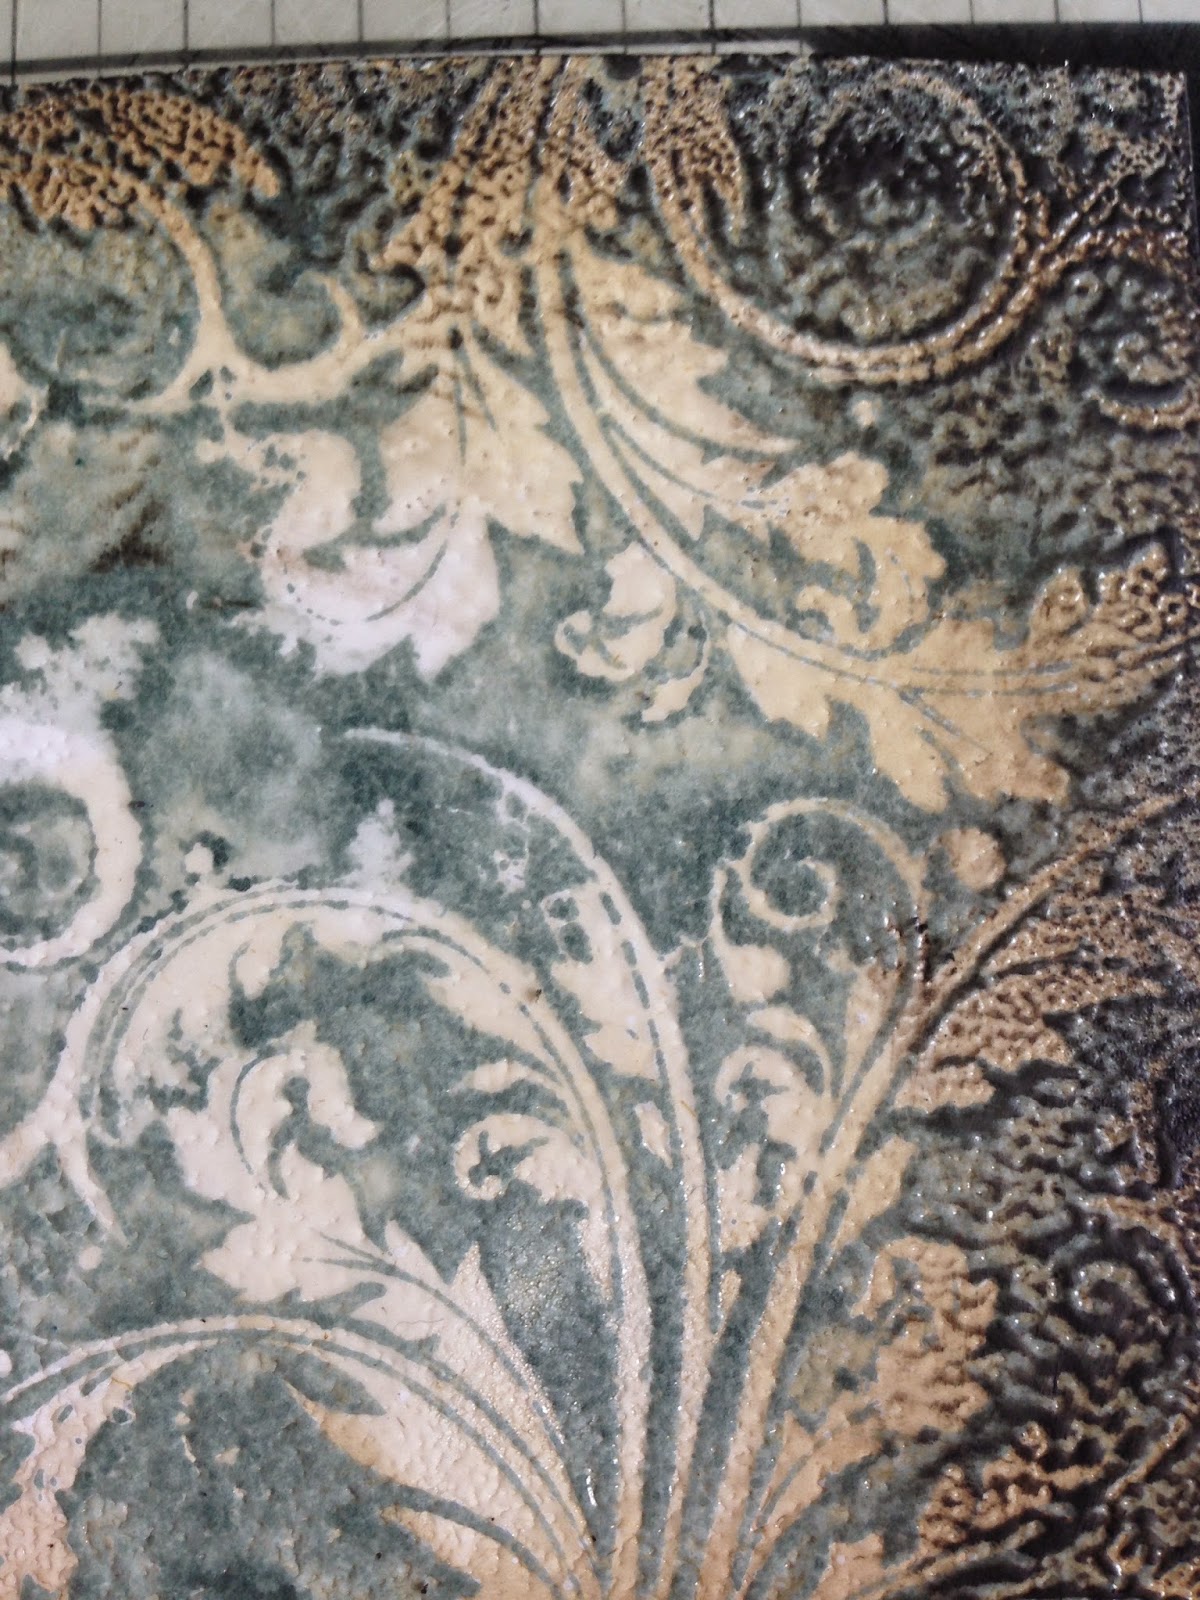


The flourish embellishment was painted with DecoArt Aquamarine and Burnt Umber and the highlighted with Dazzling metallics Glorious Gold


The small pen nibs, pen, flourish, and label were all stamped onto Tim's flourish packaging and distressed with Walnut Stain and Black Soot and coated with DecoArt Media Ultra Matt Varnish
The Ideo-Ology pen nib was coloured with alcohol inks, Butterscotch, Espresso

I hope you have enjoyed my Flourish project, please check out the other Design Team Projects on
Jools :)
Awesomeness... love your work.
ReplyDeleteIvette
Oh Jools, you have just totally done it again, LOVE this piece, the enamelled background, the frame and that cool embellishment! I adore how you combine Decoart products with Tim's techniques, fabulous, - another favourite!!!
ReplyDeleteA stunning piece of art Jools, I love all the flourishes and that embellishment in the centre is just magnificent! Anne x
ReplyDeleteJust stunning Jools, such a fantastic arty piece with so much depth and detail. I love it.
ReplyDeleteEnjoy the weekend.
hugs Brenda xxx
Absolutely stunning piece of work Jools! Love it. Karen.x
ReplyDeleteSuperbe oce
ReplyDeleteBeautiful piece Jools! Love the stepouts
ReplyDeleteAnother amazing work, Jools! Love how you developed the outside frame. You are a great photographer, too...not always easy when it comes to showing off our art!
ReplyDeleteThis is gorgeous ! Love everything about it !
ReplyDeleteCorrie x
Another beautiful project Jools. I do love how you always put a completely different spin on these themes. Jenny x
ReplyDeleteSigh. I love every little detail and there are so many details. Stunning, stunning, stunning! I don't suppose it needs a home? :p
ReplyDeleteSuch a rich, stunning artwork. Nikki x
ReplyDeleteInside and out, this frame is gorgeous, Jools! Love the way you added paint to the stamped tissue wrap! Enjoy the weekend!
ReplyDeleteAwesome art !!! Just left me speechless for several minutes... Lol... Wow this is stunning !! Love all your details, your great techniques, your color choices... Yes everything !!!
ReplyDeleteCan I ask if it's a clay .. Clay shape from a mold you used for the floral embellishment ? It is very pretty. Astrid who also commented here on your blog made another fab art work where she also used some pretty clay shapes. Can you help me by telling me which one you used ?? Please.. ?? ( mamablitger@hotmail.com). I will be grateful for any help.
Thank you for sharing your pretty work. It was very inspirational to me !!!
Hugs from Monica... Spain
This is absolutely stunning! well done love it. Dee x
ReplyDeleteA beautiful make Jools. Love all the elements you have incorporated. Have added the pen nib to my wish list...its gorgeous.
ReplyDeleteTFS and best wishes
Annie x
Jools... this is outstandingly beautiful..... just sheer elegance in all ways... I love it... your techniques are totally appreciated and are great... thanks a million.. I love that... Love, Light and Peace...Bonnie
ReplyDeleteWowzers, Jools!
ReplyDeleteYou really never ever fail to amaze me! Gobsmackingly brilliant!
Hugs,
Claudia x
Jools, this is amazing. Love the colors and details you have incorporated. I especially love 3-D and this is a great one.
ReplyDeleteHugs xx
Absolutely gorgeous! May I ask also where you got the fleur de lys center piece? Also, I am a bit confused by "Then embossed again, once dry I used Burnt umber to dry brush around the edge which really highlights the dappled enamel effect". It's the pic just before you start adhering tissue paper. Please tell us if you embossed just the edges again and then used burnt umber dry brush? Thanks for the great inspiration!
ReplyDeleteThank you your lovely feedback, the embellishment was a resin piece that I bought on eBay
DeleteThe embossed again refers to a final layer of embossing powder to coat the entire surface,
Once melted and cool I dry brushed with paint to highlight the texture created by the embossed powder
Hope this has clarified
Jools x
Sorry that I hadn't seen your response, I was away for a while. Thanks for taking the time to respond. Could I bother you with one more dumb question? How would I coat the entire surface again with EP, I would have to stamp the image again with embossing ink right? The trouble I have with that is aligning the stamp (flourish image) perfectly to match the original stamped image....am I misunderstanding this whole thing? Thanks for all your help!
DeleteHi you use the clear ink pad to cover the entire piece and then sprinkle with embossing powder and melt
DeleteJools x
Yum - love that Iced Spruce background, and the fabulous tissue stamping on the frame - another glorious creation, Jools - simply fab!
ReplyDeleteAlison xx
Wow, I am blown away with this masterpiece! Thank you for sharing how you made that background because it is just stunning! The stamped tissue paper is just genius and all your glorious colours make it even more wonderful! I just love this work of art! :)
ReplyDeleteI'm just sitting here shaking my head! I cannot believe the amount of detail here! I think you have absolutely done a perfect job with that enameled stamping technique-- one that I've been wanting to try for quite some time. You have inspired me to give it a try. The work you've done on the frame is just fabulous, colors and stamping--perfectly aged! Super piece of artwork here!
ReplyDelete