
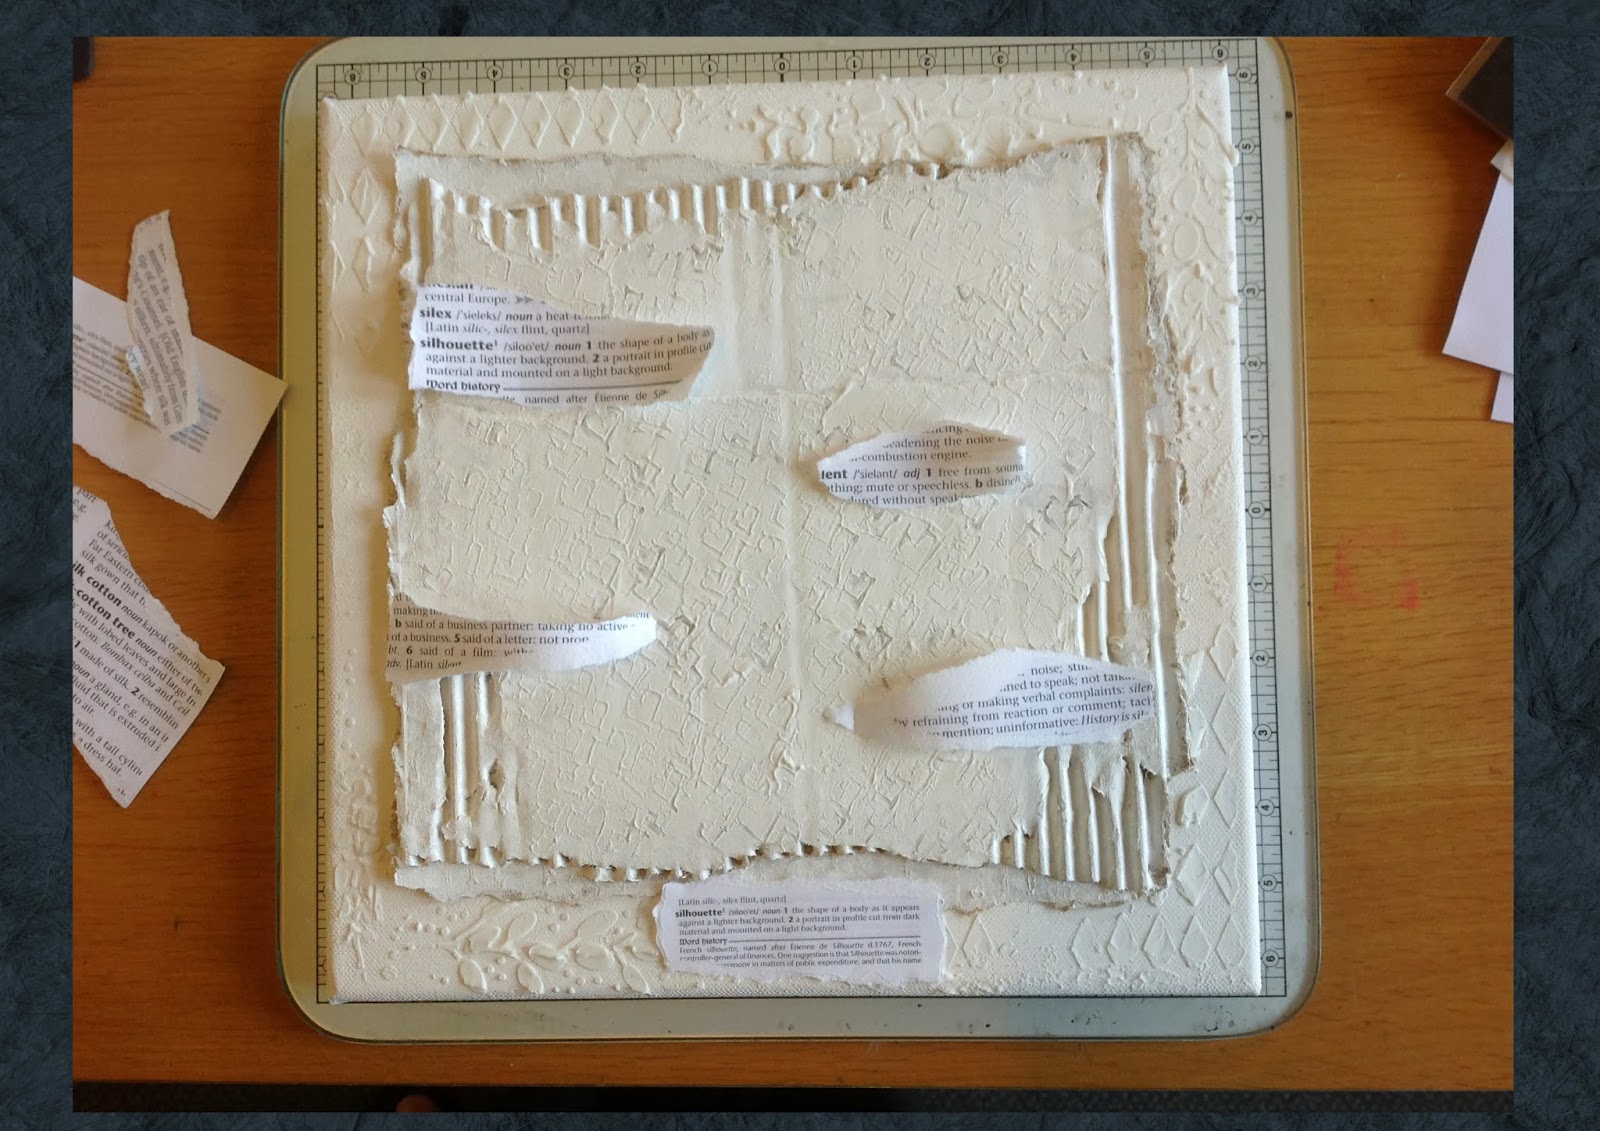
I started by applying two coats of gesso to a 12" x12" canvas, then tore a piece of corrugated cardboard to approximately 10" x 10" and distressed randomly around the edges


Next I selected Crafters Workshop Mini Harlequin & Imagination Crafts Bay leaf stencils and applied DecoArt modelling paste to the exposed canvas. On hindsight, it might have been better doing this first but it did allow for accurate placement


I then stamped into it using Stampotique Daniels Hearts, which left a nice pattern and texture


Paint time!
I wanted to create
a subtle toned graduated effect like a watery winters sky, so starting at the
top I applied DecoArt Titanium White, Orange Twist, Lemonade & Sea Aqua.
I like to apply
quite unusual brights first which show through from the texture and create a
hazy glow, it is always easier to tone down lighter and brighter colours
The lighter areas
around the centre were a combination of DecoArt Metallic Silver Sage and Shimmering
Silver


I applied the paint
in large horizontal brush strokes blending each colour into the next.
Finally, working
towards the bottom with Williamsburgh Blue then adding Prussian blue, Burnt
Umber taking it gradually darker to the bottom edge of the canvas.

At this stage the
colours were too bright so I toned the whole canvas down with white and the Metallics
adding Williamsburg blue and burnt umber to gradually darken and tone down the
overall colours


Once dry, I used
the Crafters Workshop branches stencil, applying the paint from the top down
with the lightest colour Williamsburg Blue, adding Blueberry & Prussian Blue
to gradually darken as I worked down


This was followed by a combination of Windsor & Newton water mixable oil paints Payne’s Grey and Raw Umber, as a wash over the background and around the edge of the cardboard centre to tone down and give a really distressed vintage effect


Finally I added a
touch of DecoArt Metallic Lustre Silver Spark to highlight the texture around
the edge and just a little on the edges of the cardboard to keep it subtle


I finished with a
label with the meaning of Silhouette distressed with Tim Holtz Distress Inks, as
I am entering this into The Craftbarn Alpha Challenge

I hope you have
enjoyed my tutorial, any questions please just ask
Jools :)
Stunning canvas Jools and all that lovely texture also love your choice of colours
ReplyDeleteLove
Amanda x
Stunning Jools (a word I seem to be using a lot when visiting your blog...:o))
ReplyDeleteThe step by step is fabulous, thanks so much for describing it so clearly! Have to say I love that tree stencil! Great canvas altogether!
Brilliantly done Jools, fabulous texture and colour, love the granulated palette for the trees, they are so effective.
ReplyDeletehugs {brenda} x0x
A wonderful canvas, Jools!
ReplyDeleteLove the colours you have achieved and the feeling of a late autumnal or winter sky shortly after sunset! Beautiful!
Hugs,
Claudia x
Brilliant canvas - love the moody feel of the sky. Thanks for showing us how you made it!!
ReplyDeleteGorgeous canvas and very well explained, thank you !!
ReplyDeleteCorrie x
Utterly stunning canvas, Jools... and wonderful to see those painty layers building up over the textured background. Absolutely gorgeous, and you make it seem really achievable.
ReplyDeleteAlison xx
Loving all the texture.
ReplyDeleteamazing work, Jools! background is awesome!
ReplyDeleteBeautiful canvas and thanks for all the detail on how to
ReplyDeleteMaggieH
Thank you for the step by step, a wonderful canvas.
ReplyDeleteSylv xx
You've employed great techniques for a splendid result...
ReplyDeleteSuper Canvas. BJ
ReplyDeleteAn amazing canvas, love the colors and the texture.
ReplyDeleteHi Jools! I have visited your blog for the first time today, having seen your artwork on Lisa's That Craft Place site. I'm still on your first page but I wanted to tell you how much I enjoyed this tutorial, and how easy I found it to understand your techniques. Thanks for that because I've previously found this style of work a bit scary, but seeing how you have done yours, stage by stage, you have given me the confidence to just have a go. I'm also going to enjoy looking back to see what else you have on your blog. Thanks for sharing your creativity, and thanks for inspiring me to be a little more creative myself. Best wishes for a very happy, healthy and inspired new year, Judy
ReplyDeleteHi Judy
DeleteThank you very much for your lovely comments, I'm very pleased to hear that you were inspired and that you liked the step by step, I haven't been doing these very long and it can be sometimes difficult to know what to include, so thank you for the positive feedback.
Happy New Year & Happy Creating
Kind Regards
Jools x
Wow. Fabulous piece of art and great instructions!
ReplyDelete